The first step in any restoration, or repair project is to remove the old part or parts requiring replacement. At first this would seem a simple task just get out the tools and have at it. But we all know nothing is that simple when it comes to boats and the truth of the matter is removal of the old parts can have allot to do the success or failure of a project. It can often be the hardest part of a project. Almost any project will require some removal of parts whether you’re changing the oil in your engine or doing a major hull repair. If you’re lucky the old parts will give up without a fight and life will be good, on the other hand sometimes even the simplest tasks can rapidly turn into an ordeal.
Obviously some tasks will be simpler than others but having a good plan and preparing for the worst can make life easier. Never assume that you can simply “remove the oil filter” or “remove that broken piece of wood. If you are lucky it will go your way but more often than not it will give you a fight. A few simple rules, lots of patience and the right tools will make the difference in a successful project.
The first thing to do is observe. Simply put, sit back and look at the situation carefully form different angles. Think about how you are going to take things apart and how they will go back together. Dismantle the parts in your head first, this will save you time and trouble. Ask yourself what tools you will need then think about what could go wrong and how you can handle it. What are you going to do when that screw head strips out? What if the last guy used 5200 to bed that cap rail down? Assume the worst and plan for it! If you are prepared for a battle and you get it you will at least be ready, if on the other hand things go well, then you can relax and enjoy a nice cool drink while putting your unused tools away. Think about the order in which things need to come apart. Sometimes this is not so apparent particularly in larger projects but take the time to try to get familiar with how you plan to proceed. You can always modify your plans as need be but take the time to at least get a good idea for how you will get started. See the big picture, will the parts fit out the door? Will you need help at any point? Will the new parts go back in the same way the old ones came out? Also as you look at your project think about what you do not need to do. It sort of like doing taxes, the big trick is knowing what you do not need to do, not what you do need to do! Never take apart more than you have to.
A good example of how careful planning and disassembly can make a project, is a Sportfish boat with bad deck core I once repaired. The core in the house top had gotten moisture in it due to poor bedding of fittings. A repair had been attempted by injecting resin but as the core was wet and this only made things worse when the resin mixed with the water in the core and would not harden. Taking my time I marked all areas of bad core and decided to remove a large section of the house top outer laminate in one piece. I cut around the break in the non-skid and carefully peeled the top laminate off in one piece, replaced the bad core and was able to glue the top laminate back in place leaving only the smooth edges to repair. Careful planning and removal made this project a success and reduced the time of the repair considerably. This is a prime example of how properly taking something apart can make all the difference in putting it back together.
Ok so now you have a plan you have gotten together all the tools you think you will need and then some. Now its time to get started. The first thing to do is protect the surrounding area from damage. Cover the floors or decks near the war zone. I like to use a blue heavy plastic sheeting to cover floors and any nearby woodwork. But lacking this cardboard works well if it will not get wet. Most home improvement stores sell carpet protector sheeting for covering your walk ways. And when in doubt don’t hesitate to call your local contractor, the Orlando area general contractor for example helped with the logistics. Lay a path to your work area so you do not track dirt and debris into or out of the boat. Nothing worse than finally removing a part only to look back and see it dripped oil or worse battery acid down the carpet or teak deck on the way out. I have seen both happen. I always say “progress is messy” so cover as much as possible. This is also a good time to get the vacuum cleaner ready. It is important to keep your work area clean the whole time you are working. This will greatly reduce any collateral damage. Dirt spreads so keep it to a minimum and clean up often.
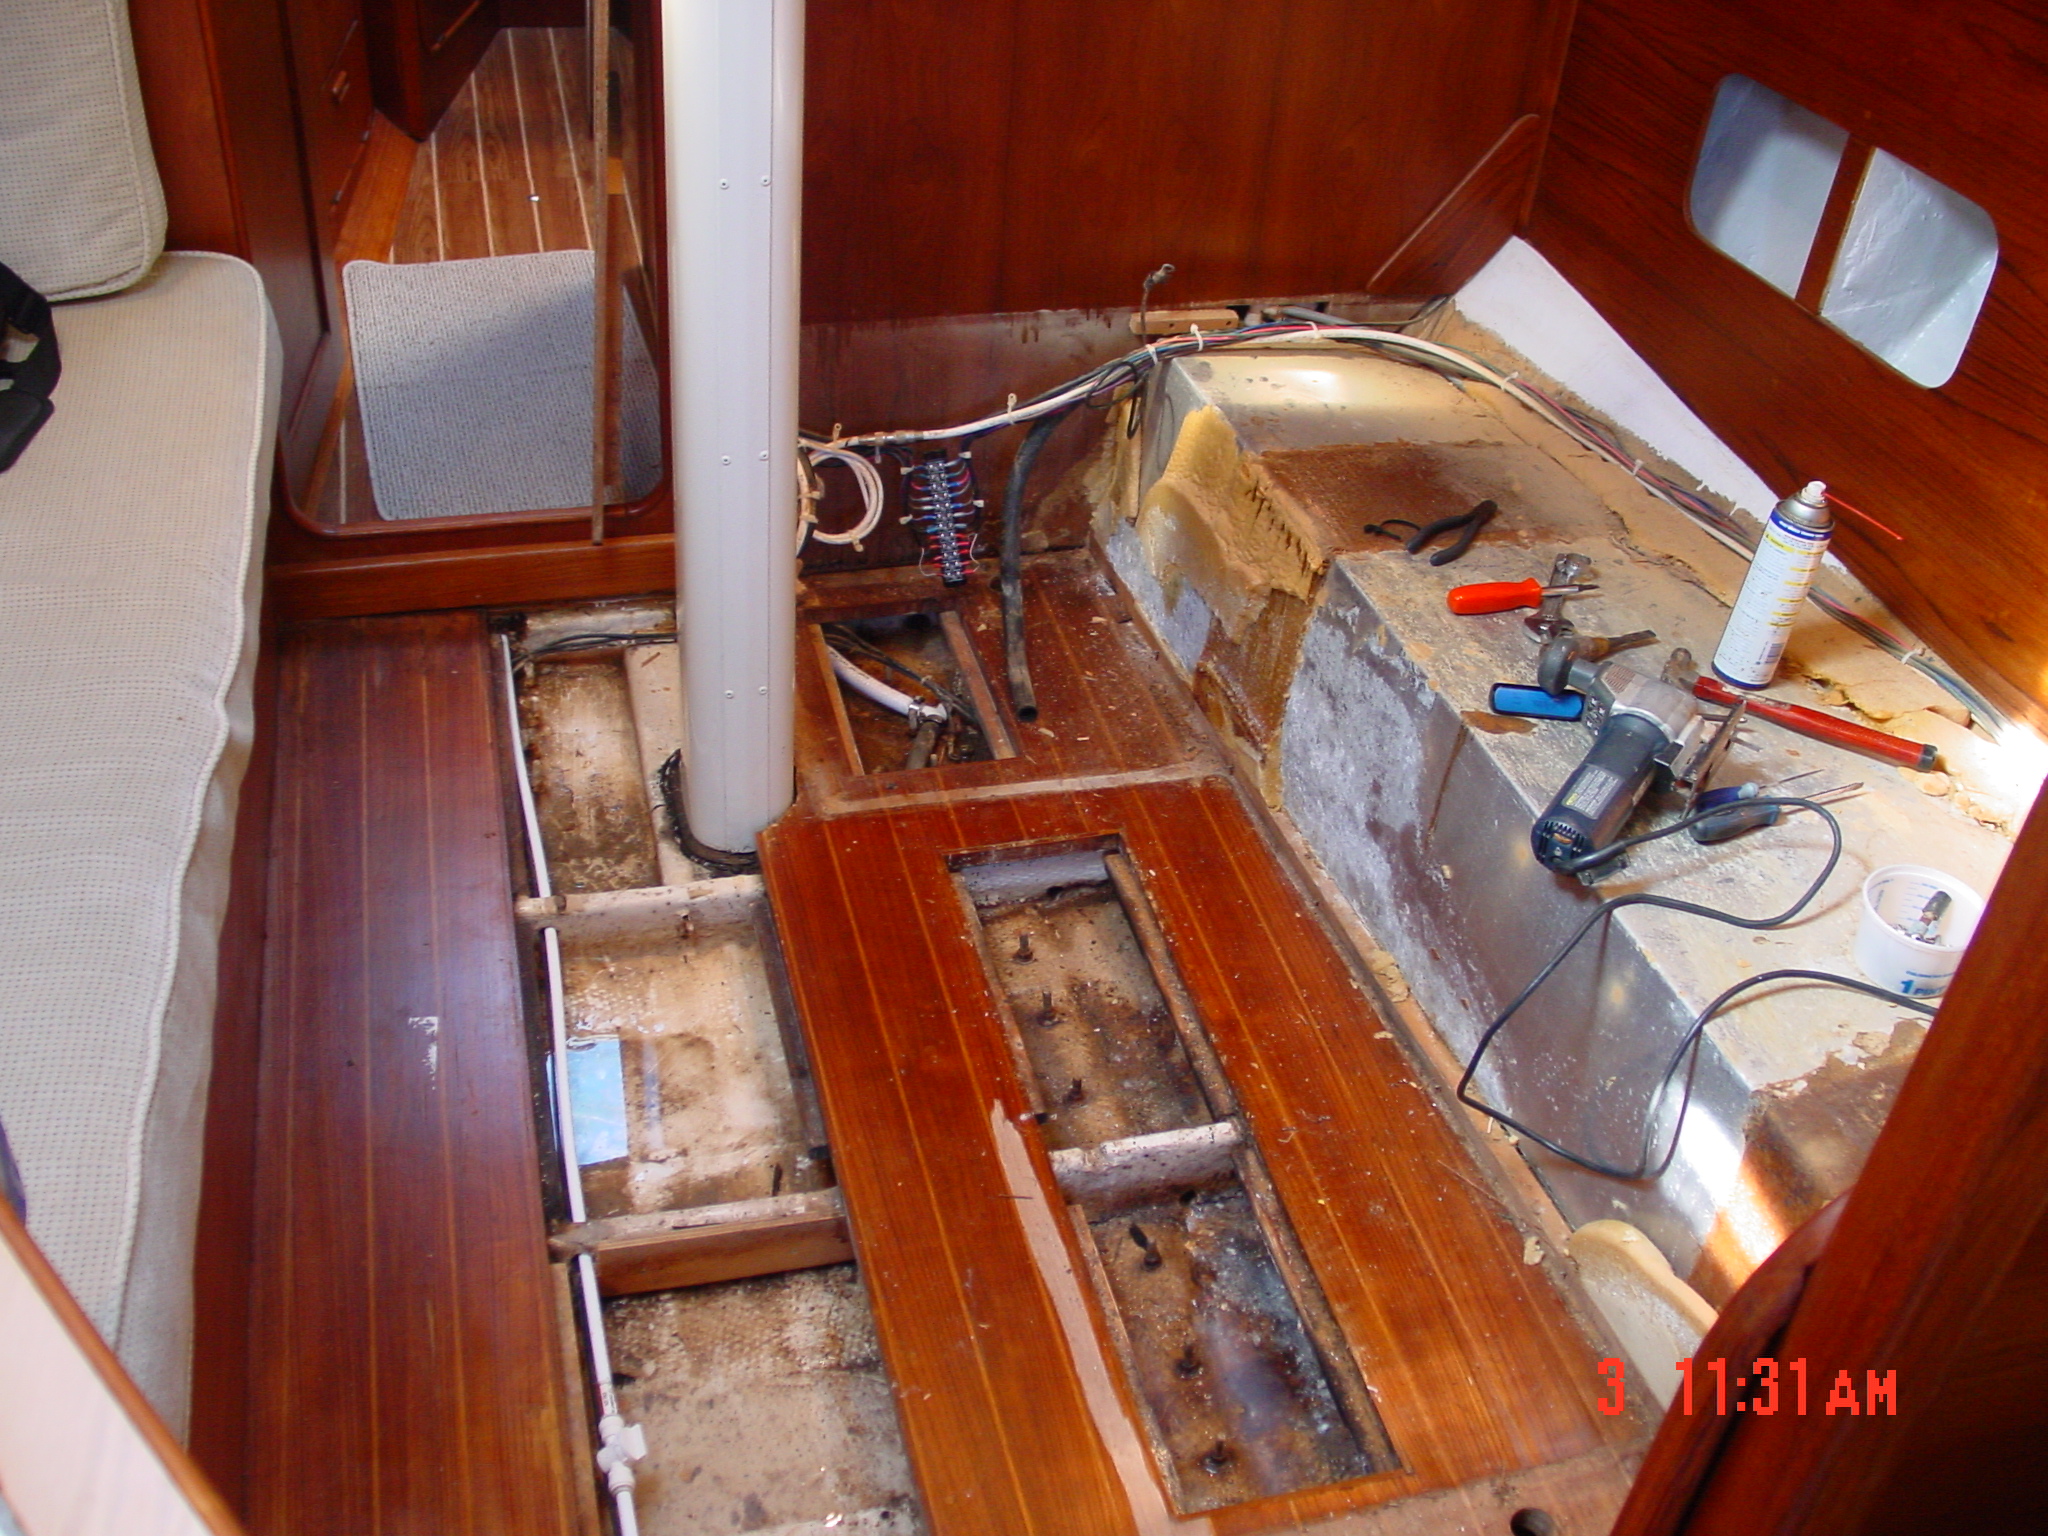
Now that you’re ready its time to get started, you have thought this through so start at the top and work your way in. As you take things apart use zip lock bags for the small bolts and screws and painters buckets or boxes for the larger parts. Be sure to label these containers as they will all look alike days or weeks later when you go to put things back together. I save even the screws and bolts I know I will not be using as they will help me figure out what size to replace them with. In big projects be sure to also note the location the parts came from, as in “floor hatch forward cabin.” Not just “floor hatch” Trust me this will save you a lot of frustration. Take your time to remove parts carefully. You may need them as samples or templates. It is always easier to find a replacement if you have something to take with you to the parts store, and those old wood parts even if badly rotted if carefully removed can be great patterns saving you time in fitting the new parts. So resist the temptations to just tear it apart! Taking your time now will payoff in the long run.

Hi, Cap’n Manning
I’m a retired old Fart over in Lake Wales, Fl. I’m a retired Sailor off the great Lakes and am refurbishing a 1977 GMC 23 motorhome. If you recall it was the goto land yacht for Sailors in the 70′ & 80’s.
Here is an example: http://www.gmceast.com/technical/Prigmore-LandYacht-Spr10.pdf
I noticed that you posted a note about “Amtico Flooring , comes in 3′ strips , 3″ wide x 3′ , very easy install” . Can you give me more particulars on what the Teak plank part # was and how you added the holley style strips. Did you use the Amtico adhesive? I’ve looked at some very, very expensive product that only come in 72″ widths and are $50 per foot!!!! What was your source in eastern Florida?
I am sorry but I do not have the sources where you are. I got mine from a high end kitchen store. I would contact Amttico for dealer info
Thanks