By Capt. Wayne Canning, AMS
Sealant Failures
Before trying to figure what sealant is best for any particular application it helps to understand why sealants fail in the first place. There are three types of sealant failure: adhesive, cohesive, and substrate. Simply put, the bond between the sealant and the substrate can fail, the sealant itself can fail or the substrate can break. That said most problems with caulked joints are commonly due to one of two errors. Either the substrate was not effectively prepared, or the wrong product was selected. I often hear complaints of sealants failing a short time after application. Often the sealant its self is mistakenly blamed for the failure, the user swearing they will never use that sealant again. The problem more often than not is that the wrong sealant was selected for the task at hand. A classic example of this is the use of polysulfide or polyurethanes being used for installing plastic portlights. These sealants, do not stick to these types of plastics due to oils in the plastics. It is not a failure of the sealant but a failure of the installer to select the right product for the task. Once you have selected the correct product care needs to be taken to use it correctly and not over extend its abilities. Filling seams too large or with too much movement will lead to failure. Sealants also need to be allowed to expand and contract within the seam. Sealants pushed into a 3 sided channel are restricted in full movement and will eventually crack and fail. Substrate failures are often seen when caulking over painted surfaces. The paint will fail and lift off the surface allowing water to enter under the paint not the sealant. Other types of failure can relate to age, weathering, sun damage, mould and mildew damage. Some sealants can be softened or damaged due to the use of chemicals, oils and solvents while maintaining the boat. While most sealants have good chemical resistance when cured, the use of chemicals during clean up or when smoothing down the wet sealant can adversely affect their chemistry and life span as well.
Preparation
Once the proper sealant has been selected for the job at hand, proper preparation is the next key to success. For re-caulking an existing installation, the first task will be to remove the fitting. If the fitting is put down with polyurethane it will be hard to take up. It is recommended to tape around the fitting to protect the surrounding area. Once the fasteners are out, start by slowly working a thin screwdriver under the fitting while cutting the caulk with a razor knife. Anti Bond 2015, a solvent and softening agent is very useful for helping remove Polysulfides and polyurethanes. Work some Anti Bond under the fitting as you go. Take your time and do not try to lift the fitting faster than it wants to go. Stopping from time to time to, while leaving a wedge under the fitting will give the sealant time to “let go.” It is best to start on one side and peel up to the other. A thin serrated knife will also help to cut the sealant. Once the fitting has been removed be sure to completely clean off any old sealant and residue. A sharp chisel will help remove the old sealant as close to the surface as possible. Pulling the chisel backwards like a furniture scraper is also a good way to remove stubborn thin sealant remains. Solvents and cleaners can help remove the final film. Scrubbing with an abrasive pad will also help remove the film. A final light sanding with 220 grit paper will leave a surface with some “tooth” for the new sealant will help. If sealing to fiberglass wipe down with Acetone to remove all traces of mold release wax. Even on older boats the wax can remain for many years if covered. Make sure any solvents have completely evaporated prior to applying the new sealant. If removing a fitting sealed with silicone it is best to reseal with silicone as it is almost impossible to remove all traces of the silicone. Silicone will stick to itself but other materials will not stick to silicone so it is best to stick with silicone.There are basically three types of caulking. Seam filling, bedding of parts, and “beauty beads” or fillet beads. Proper preparation of each will ensure success.
![]()
When seam filling it is important to make sure the seam to be filled is not too deep or wide for the sealant. Sealant applied too thickly may not cure properly this particularly true of the air cure sealants. To ensure long life of the sealant it is important to have the sealant sticking to only two sides of the seam. This means it should not be allowed to adhere to the bottom of the seam. If it does the sealant will not be able to fully flex with the seam expansion and contraction. This will lead to cracking and ultimately failure of the sealant. If the seam is wide and deep I recommend putting neoprene weather stripping or rod into the seam as a filler then applying the sealant over that. This will reduce the mass of sealant needed and prevent any bottom sticking. If the seam is small and shallow like the seams in teak decking a thin strip of masking tape called a “bond breaker” is put in the bottom of the seam prior to applying the sealant. Some sealant manufactures recommend a primer be applied prior to the substrate. Check with the sealant manufacture before starting.
![]()
Bedding parts and fittings is relatively easy, but there are a few tricks that will help improve success. Drill all holes needed and dry fit the fitting before getting the caulk out. It is recommended to counter sink the screw or bolt holes under the fitting or better yet on the fitting itself. This will leave a channel for the caulk to form a gasket around the fastener. Slipping a small O ring around bolts and into the counter sink area to create an additional seal around each fastener will also ensure a good seal. Always clean new parts with solvent prior to installing as many new parts have tooling oils or other chemicals left of their surface from manufacturing. Use caution when using solvents on plastic and if in doubt test a small area first. A light sanding will also help give the surface some tooth for the sealant to stick to.
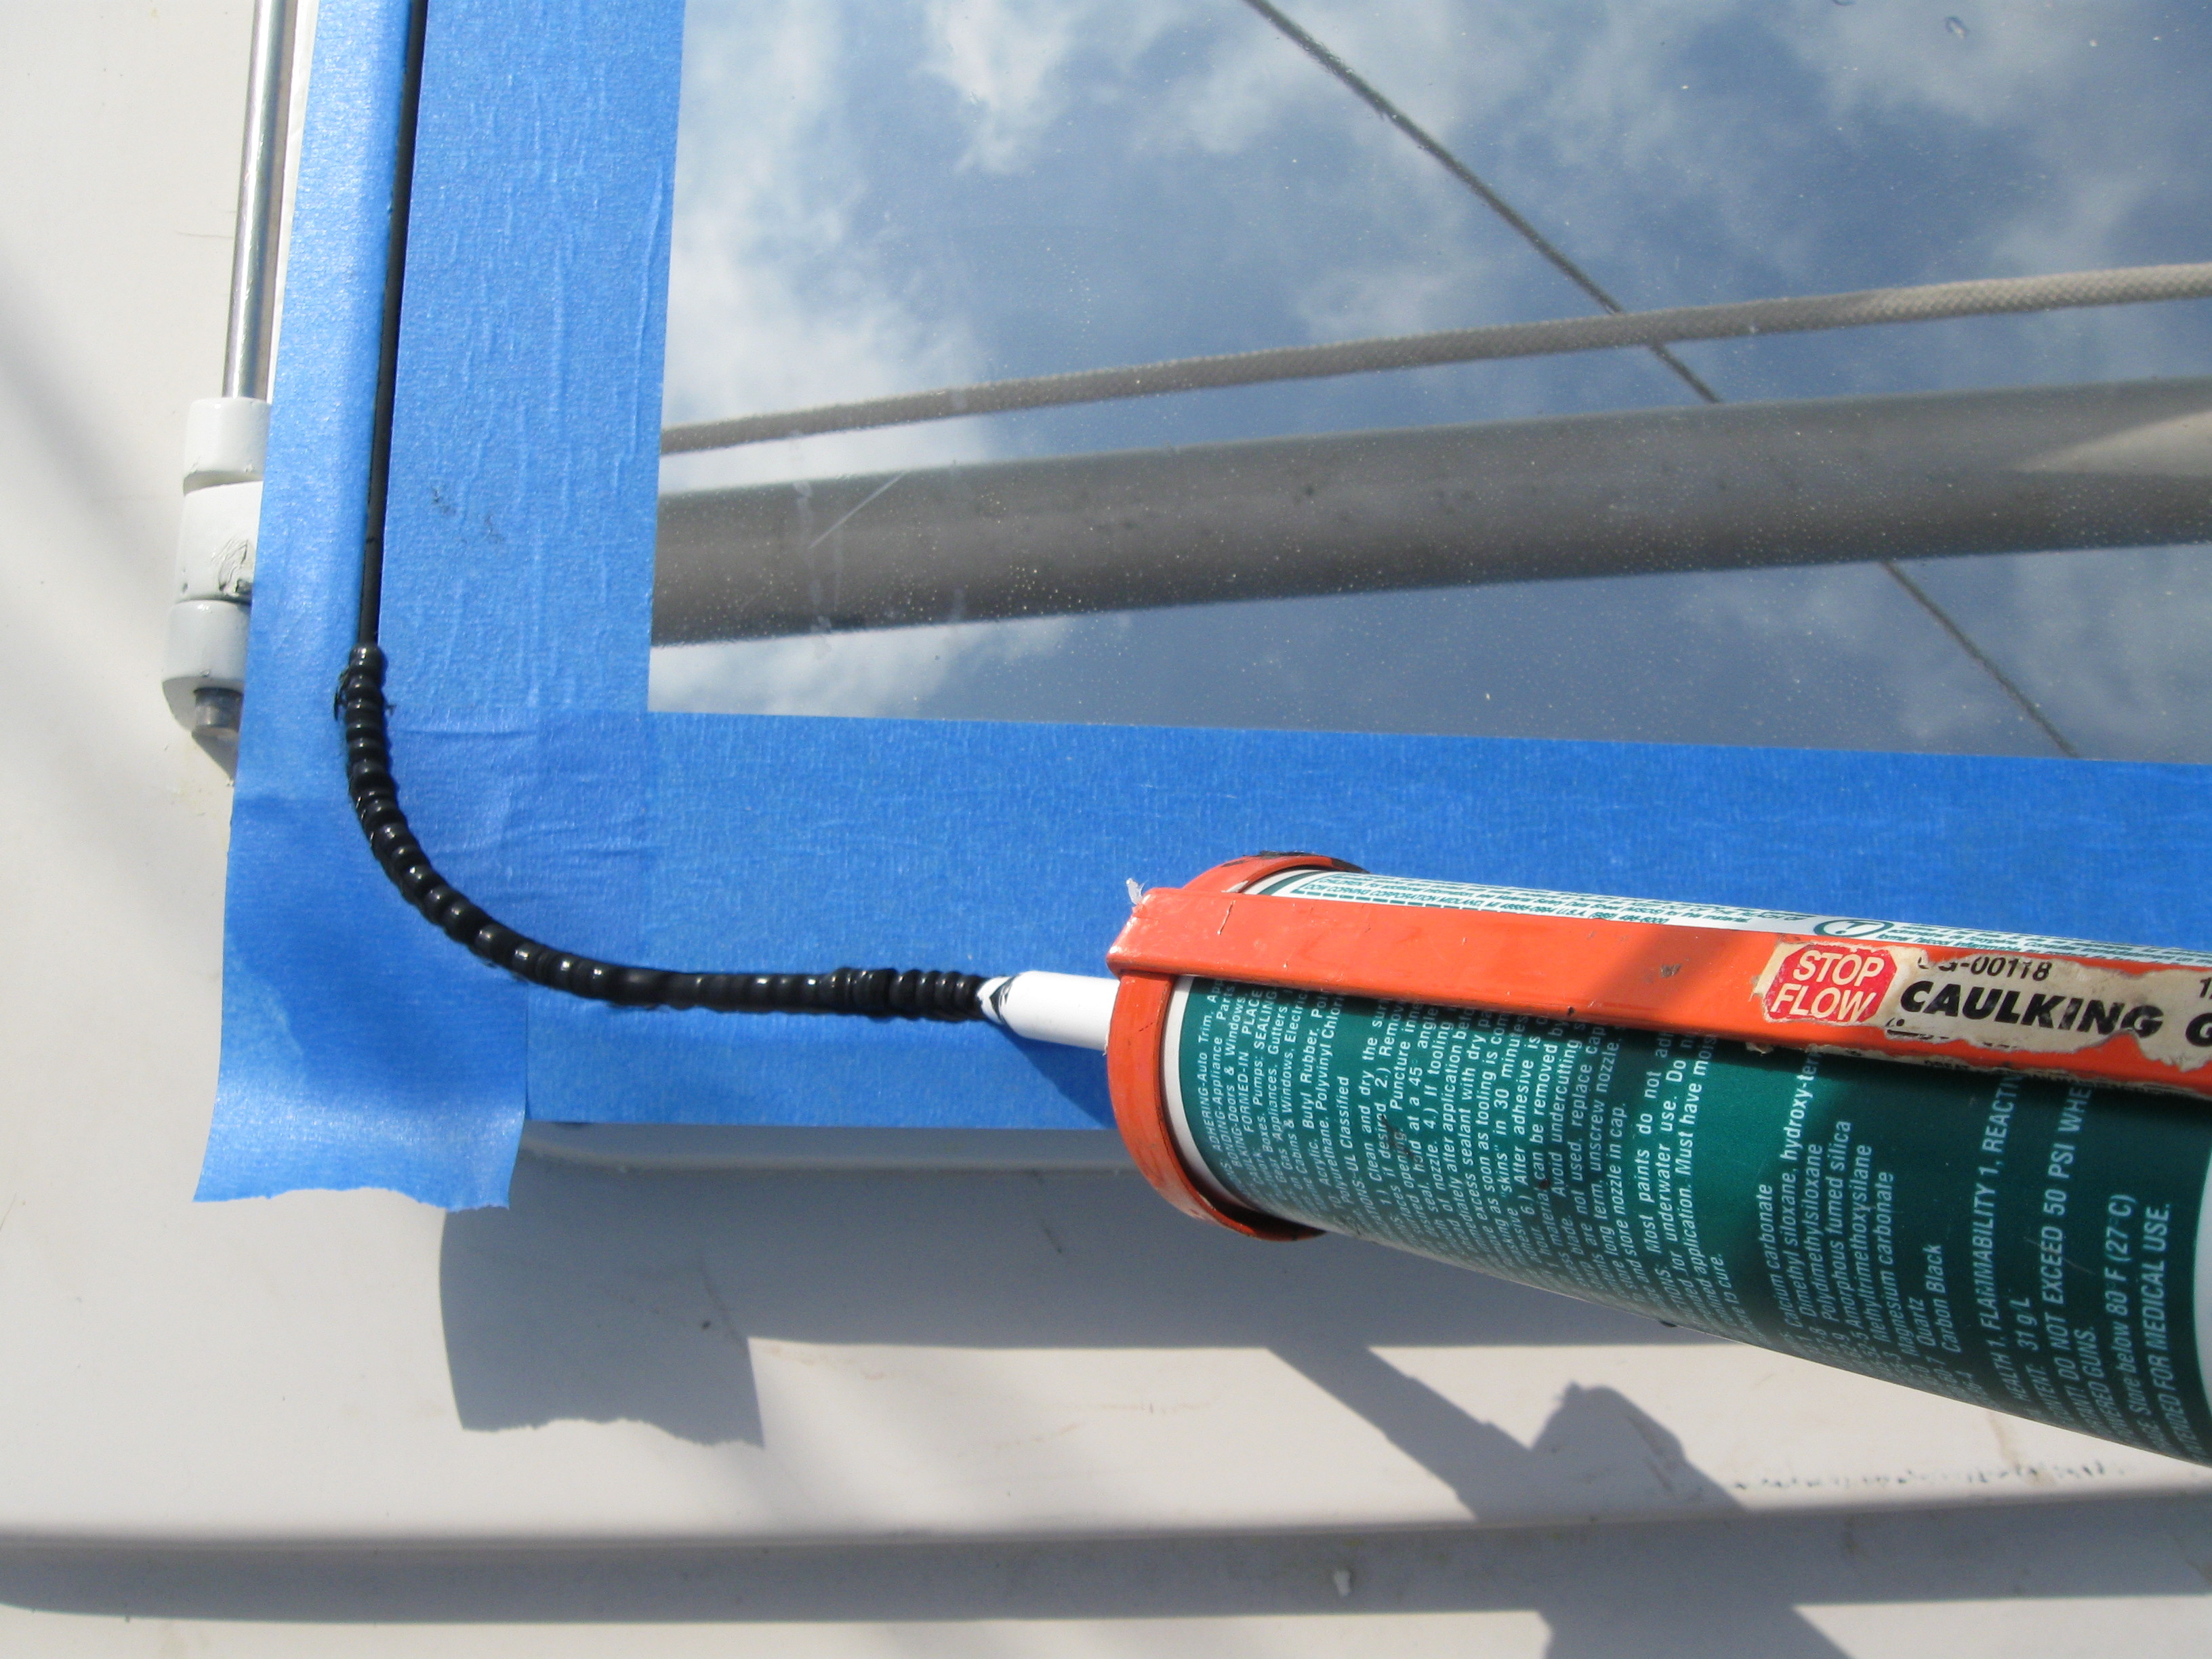
Fillet caulking, normally done in corners, requires little prep other than making sure the area is clean and free of contaminates. If a crack is present try to open it up a bit with a scraper to give an opening for the sealant to get into. It can help to cut a bit of a V into the seam to give the sealant more to “hang on to.” If the surface has been painted check for loose paint and repair prior to applying the sealant. Flush with a solvent to remove contaminates. Make sure the seam is completely dry.
To tape or not to tape? This can lead to some heated discussions around the boat yard, as some swear by it and others do not. Having done both I prefer not taping myself but everyone has their preference. The only time I tape is when working with hatch lens and sometimes when installing black framed portlights using black sealant. If masking tape is used, remove it while the sealant is still wet, peeling back and away from the seam at a low angle. This will prevent the tape from lifting the sealant from the edge of the seam. Taping takes additional time and can be very tedious, particularly so when doing teak decks. In most cases if the sealant is applied correctly there will be no need for tape. On the other hand some may find the tape worth the extra time with the time savings in clean up.
Applying the sealant
The sealant has been selected, the project prepped so now it’s time to get the caulk gun out and get started right? Not so fast, before the tube is opened we need to talk about cleanup. Most sealants become tack free fairly quickly, (meaning the surface skins over) even more so when working out in the sun and wind. You have to have all your cleanup supplies ready to go before you start so you can clean up as you go. It is also a good idea to have a clear idea of how to do the cleanup. If doing teak decks or other wood caulking cleanup is easy, just leave the sealant till it has cured and sand it down flush. Most sealants shrink while curing; leaving the bead high in the seam will ensure it will be flush when finished. This also reduces stress on the sides of the seams during cure. Pretty much any other project will require you clean up as you go. Small projects like bedding a fitting are easy just use a putty knife to remove the excess and wipe the film up with a solvent soaked rag. Trim the wet caulk back as close to the fitting as possible with the putty knife. Use a narrow tool for getting into tight places. Remove as much excess as possible so that it does not smear and spread as it is wiped it down. When cleaning excess sealants always use solvents recommended by the sealant manufacture. Non compatible solvents used for cleanup can affect the cured properties of the sealant. If excess sealant needs to be removed to form a filet you can use a plastic putty spreader that has been cut into a radius the size needed for the fillet. This will make a very clean concave surface. The rounded spreader will push the excess sealant off to the side where it can be scooped up with a putty knife. If the surface of the sealant needs further smoothing, lightly spray with soapy water then smooth as needed. Never use solvents for this. Have plenty of clean rags available and a trash can to put soiled rags into. It can be surprising the mess a rag with wet sealant will make when the wind blows it down the deck.
Now it is time to start caulking. Cut the tip off of the tube at about 30°-45°. Puncture the inner seal with a nail or other tool. Push some sealant up the nozzle till it just starts to come out. Some sealants will have some air in the cartridges. This will get compressed when you push down on the plunger causing the sealant to keep coming out after the trigger has been let go. It is a good idea to release the pressure on the plunger when you finish running a bead. Doing this will save sealant and reduce the mess. I always set the tip over a rag when not using it, and wipe the tip clean before starting another bead. Another big controversy with caulking is whether it is better to push or pull as you run your bead. Pulling the gun towards the user allows you to see the sealant bulge up and overflow the seam as you go. This can be done by pushing as well so it really comes down to personal preference. No matter what method you use it is important to see the sealant go fully into the seam and overflow just a bit. Avoiding trapped air pockets is important to a leak free seal. Always apply more sealant than needed then clean up the excess, this will ensure the sealant is fully doing its job without voids. When bedding through bolted parts be careful not to turn the bolts but rather only tighten the nuts. This will prevent the sealant from being pulled out of the bolt hole by the treads on the bolts. If the holes are counter sunk as suggested earlier the sealant will fill the counter sinks and make a good seal even if most of the rest of the sealant is squeezed out from under the fitting. I have heard some people suggest not fully tightening the bolts till the sealant is full cured. The thinking here being that you will not squeeze all the sealant out from under the fitting. The problem with this is it is all too easy to let the bolt turn when doing the final tightening. Even a small turn will break the seal around the bolt.
As can be seen not all sealants are good for all jobs. Unfortunately there is no one sealant that will work for all things. Silicones and Polyether’s are the most useful for general purpose work. The polyurethanes are only really useful for high load applications and the Polysulfide’s are best for underwater use. Understanding a sealants limitations and strong points is important to picking the right product for the right application. Careful selection is the first step towards a successful job. Once the proper sealant is picked, careful preparation and application will result in a clean professional look and a long lasting seal.
